
I have a husband and a two-year-old daughter, and we all love to eat! So as you can imagine, we spend a good amount of time in the kitchen. With all that activity, it drives me NUTS when our kitchen towel ends up on the floor. With a two-year-old this happens a lot!
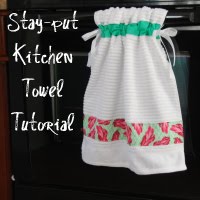
I'm excited to share my solution with you . . . the Stay-put Kitchen Towel. It's easy to make and you can showcase your favorite fabric on a previously boring kitchen item. Perfect!

(Scroll to bottom of post for a printable version of this tutorial.)

Materials:
- one kitchen towel, and be sure to prewash if it's new!
- three strips of fabric (see cutting details below)
- 2 yards coordinating ribbon for ties
- coordinating thread
- measuring tape
- rotary cutter, self-healing mat, and ruler
- sewing machine (and I recommend using a walking foot if you have one)
Cut three strips of fabric as shown in picture below:

Step 2: Fold under raw edges of strips
With right side of fabric strip facing down on your ironing board, fold over 1/4" on each short side toward the wrong side of fabric and press.


Repeat for all three strips of fabric.
Step 3: Determine spacing and place strips on towel
Using your measuring tape, measure around your oven door handle and determine where you'd like your ribbon ties to fall. (For my handle, I'll sew the ribbon ties 6" apart.)

Place strips on towel, spacing your top two strips based on your measurement from the last step. I measured from center of strip to center of strip, since the ribbon ties will be inserted behind the center of each strip.

Pin strips in place to prepare for sewing.
Step 4: Sew strips onto the towel
Stitching close to the edge, sew strips onto the towel

IMPORTANT: For the top two strips, sew only the top and bottom (long sides) to the towel, leaving both short sides open. This creates a tube where we'll insert the ribbon in Step 5.
For the bottom decorative strip, stitch along all four sides.

Step 5: Feed ribbon through the tube
The easiest way to do this is with a Clover Easy Turn Tool (shown below - I got mine in the sewing section of our local craft store.) If you don't have one, attach a safety pin to the end of your ribbon and "inchworm" it through your top tube.

Step 6: Measure and sew the ribbon tie


Step 7: Create the gather
Hold the loose end of your ribbon taut while you gather your towel to the desired width. Just go with whatever looks good to you.
Pin loose end of ribbon in place, and cut your ribbon to the same length as the other side.

Stitch along the edge of the fabric tube, securing it to the towel and sandwiching the ribbon in between (just like the other side.)
Step 8: Finish the towel
Repeat steps 5 through 7 for the second strip, and you're done!

Go ahead and tie it onto your oven door handle. Nice job!

(Added 6/6/10):
Treat your ribbon ends to prevent fraying
Touch each raw edge of cut ribbon to an open flame (a lighter or candle will do.) You'll notice that the end of your ribbon will melt slightly, "curing" the ribbon and preventing fraying in the wash. Easy!
Items made from this tutorial are for personal use only, please.
Happy sewing!
Mary


I think you must have read my mind {or been spying on my kitchen} I am constantly picking up my towel and I keep thinking I need to come up with a way to make it stay put. This is perfect! Very nice tutorial....can't wait to give it a try.
ReplyDeleteSo smart!!! Love your tutorial-so clear and easy to follow. Great photos also. Thanks for sharing!
ReplyDeleteditto to what Vanessa said, very clear and easy to follow, great pics too! love it!
ReplyDeleteThat's so pretty!! And the way the ribbons go through the casings and tie at the side is so clever!
ReplyDeleteI linked to your tutorial on Craft Gossip Sewing:
http://sewing.craftgossip.com/tutorial-stay-put-kitchen-towel/2010/05/24/
--Anne
Very cute Mary!! I'll have to give it a try.
ReplyDeleteLOVE it! I am in serious need of one. And bad news, my kids are 5 to 10 and they still drop the kitchen towel on the floor. It's just not something they outgrow. :)
ReplyDeleteThat is so darn cute!!!
ReplyDeleteVery cute and practical. Thanks for the great tutorial!
ReplyDeleteLove it! I have the same pet peeve. And am embarrassed to admit that it never occurred to me fix the towels on the rack before! Thanks :)
ReplyDeletePerfect! I'm so glad I found this, can't tell you how often the towel hits the floor. Thanks for the idea - now off to make my own!
ReplyDeleteGREAT idea! Thanks for the tute.
ReplyDeleteLovely! Such a professional tutorial, great job Mary!!!! I've never heard of a clover either... I may need one!
ReplyDeleteBless your heart you know exactly how I feel! My boyfriend finds it IMPOSSIBLE to keep the towel hanging up.. I might have to sneak this in and see him try to pull it off. HA take that! Thanks!
ReplyDeleteVery cute. It's my husband who puts towels back all wadded up, sort of stuffed into the bar of the oven. Drives me nuts. I need to outsmart him!
ReplyDeleteThis is super cute and practical! I will definitely spruce up my kitchen towels using your great tutorial. With children around, this is also a great way to keep the towels where they should be.
ReplyDeleteThanks for sharing!
xoxoxo
Love.It.
ReplyDeleteYou are so stinkin' creative!!! :-)
I love this. Thanks!
ReplyDeleteGreat tutorial! I so need to do this to mine!
ReplyDeletenow thats creativity at its top just love the idea ,i mean WAAAAAOOOOOO ,i will definitely make this but not for my kitchen for the towel hanger thats placed next to the basin in our dining room as my little daughter always pulls the towel down and then throw it some where :)
ReplyDeleteBrilliant! Thank you so much for sharing!
ReplyDeleteI'm definitely going to give this project a try. It looks so pretty. Thanks for the tutorial!
ReplyDelete(PS I'm following you now!)
This is cute!! I can't believe this is your first tutorial ever! You've explained it so well that I know I can make it too!! I need one of those for my kitchen!!
ReplyDeletehi mary! my bag arrived the other day and it's even cute in person - i love it and thanks again!
ReplyDeletei really need to make some of these towels... i'm constantly picking them off the floor thanks to my 2 year old :-) and those quilts are amazing. have a good holiday weekend! shana
This is AWESOME! thanks for sharing it. when I get my new machine I am gonna make up a batch of these for Christmas gifts (along with other handmade stuff)
ReplyDeleteI love it!
Susan
You are a genius! It's my husband who is the dissappearing towel culprit in my house. He's always taking it off and not putting it back! grrrr.
ReplyDeleteThanks for sharing this!
PS - I'm only a couple hours from Myrtle Beach!
Yipee! Thanks so much for sharing. After years of having my dish towels on the floor, no more. I am heading to my sewing machine as soon as possible to sew. Thanks so much.
ReplyDeleteYou are my new hero!
Love the tutorial. Just made my first one today. Only have one question though...how did you keep your ribbon from fraying in the wash/dry? I tried fray check and it seemed to work on 3 of the ribbon ends, but one got completely obliterated in the wash.
ReplyDeleteThanks!
I think this is a great idea. My towel also is always falling on the floor from my stove handle.
ReplyDeleteI hope you don't mind I am posting a link to it over on SewForum in the embroidery section and I think I may make a couple of these this week.
These would make great gifts.
Carol, CajunQuilter
I know I am late in the game but this is too cute. I have got to do this...I hate that dropped towel and I just got a bunch of new plain towels on clearance at Kroger for .37 each
ReplyDeleteThis is fantastic. thanks for sharing this
ReplyDeleteI loved the idea so much, I knew I had to make some of these. I also posted on my blog about your tutorial with a link to this page. Thank you.
ReplyDeleteegyptian cotton towels
The idea is so nice. Thanks for sharing it to us. You are really so creative.
ReplyDeleteThese are cute...how would you make them for the refridgerator handle?
ReplyDeleteGreat idea! I was thinking of doing something like this, but using buttons to hold the towel on the rack - it's the one in the bathroom that ALWAYS ends up on the floor...the one on the stove likes it find the floor occasionally too! Thanks for the ideas! :)
ReplyDeleteFantastic! I've always just inserted snaps with a fold over, but I really like the gathers here.
ReplyDeleteI think these are really cute--thank you for the tutorial!!
ReplyDeletePrecious! I found this on Pinterest and knew I had to try them. I'm thinking of making cafe curtains out of them. Have you tried that yet? Maybe I'll use big napkins or even tea towels since I won't need the terry cloth to dry hands on them (or maybe I WILL with my 4-year-old twins!).
ReplyDeleteI'm in NoVA, too. Glad I found you. Would love for you to follow me:
http://cayenne-paper.blogspot.com
Katie ;)
LOVE this!! I've gotta try it!!
ReplyDeletexoxo,
Kristy
itsanadorablelife.blogspot.com
Super idea! This is one of those "duh, why didn't I..." moments. Will definitely have to make a bunch of these.
ReplyDeleteXoXoXo
Joy @ tomorrowsmemorieskjlb.blogspot.com
I completely agree with Joy. With 4 kids I am always searching for kitchen towels that seem to "walk away". I am so excited to do this...I can't sew yet, but I am thinking this is one project I can start and complete easily.
ReplyDeleteOLA AMIGA, SOU A ETÉLIA DO RIO DE JANEIRO, ACHEI SEU BLOG E VI ESSE PASSO A PASSO...ADOREI...OBRIGADA...VOU FAZÊLA PRA MIM...BEIJOS...
ReplyDeleteGreat tutorial. Thank you. I found you way of Pinterest. You have a lot of nice things here, hope you don't mind if I check in every once in a while.
ReplyDeleteVery cute, and practical!
ReplyDeleteGreat idea! I'll be making one for the kitchen AND the bathrooms ... my boys are the worst about dropping the bathroom hand towels on the floor!
ReplyDeleteBrilliant idea - so simple, so practical, so pretty. I pinned your tutorial - hope that's OK with you! http://pinterest.com/pin/409915021/
ReplyDeleteThanks for posting it.
Thank You sooooooooo much!!!! My husband and teenager son always grab the towel and never put it back. I cannot wait to see this.
ReplyDeleteHello!
ReplyDeleteObrigada pela partilha generosa...!!!
Beijos!!!!!!
C'est une idée géniale pour un cadeau de Noël.
ReplyDeleteMerci!
Oh, such a smart idea! I have stuff already to make these. Between the 2 year old and the dog, we can't keep kitchen towels in one place, so they are just tossed on the counter. And I have the turning tool, but never thought about using it to thread ribbon (elastic, too???) - thanks for the genius idea!!!
ReplyDeleteQuestion: I noticed that the end of the fabric where you thread the ribbon is sewn. I assume you sew it before you add the fabric to the towel? Silly question!!
ReplyDeleteThis comment has been removed by a blog administrator.
ReplyDeleteGreat work Thank you Sagrb that in the near
ReplyDeleteI just made 2, love them!! thanks, Kim
ReplyDeleteI just made a set of towels! They came out so cute! Maybe a dumb question, but does anyone have any recommendations on how to clean these pretty towels? I would imagine throwing them in the washing machine would ruin the ribbon? Help please!
ReplyDeleteThese are so cute...too cute to use?
ReplyDeleteI'm going to do this. I just may try this with sheets or towels for kitchen curtains.
ReplyDeleteThis is a great idea! I have 2 kids (6 & 8) and they still drop the towels daily.....
ReplyDeleteThis will be a great addition to my kitchen and bathrooms! And I will also be making these as Christmas gifts! Thanks for the tutorial! Looks like you have a lot of thankful people! :)
Thank You. I made a few of these and posted them. I love how easy and quick they are to make. I used yoyos for flowers and did a few other things but all in all the idea stayed the same. They are so much fun. I made one larger and didnt gather it at the top as much so it could be used on a charcoal grill on a boat. Thank You Again.
ReplyDeleteI'm thinking that Velcro instead of ties might be a good idea. Has anyone else tried that?
ReplyDeleteI'm making a couple of sets for my daughter and daugher - in- law for Christmas. They will make cute stocking stuffers. Thank you for the post.
ReplyDeleteWhat a great idea. I love the idea of using the ribbons. Thanks for sharing the tutorial.
ReplyDeleteMaureen
www.maureenmakesit.com
I'm thinking about making these but doubled sided. Maybe fall/winter with a neutral ribbon color. Wouldn't that be cool? My GF's can use it starting in Sept. & flip it over for Dec thru March. I'm going to start looking in the remnant bins!
ReplyDeleteOn my Christmas list to make for gifts....Thanks so much for the cute idea !!!!!!!! Michele
ReplyDeleteThis is genius. It would drive me crazy when the towel would fall...right into the dog's water bowl! I just finished making 20 of these to give as gifts at our annual tea party. I can't wait to give them out!!
ReplyDeleteBTW...I ordered a pack of 25 bar towels for $27 on Amazon, and got a bunch of fat quarters from the craft store. I got two towels worth of fabric from each fat quarter, add in a few spools of ribbon, and have 20 cute, inexpensive gifts for roughly $2 each!
ReplyDeleteI love love this!!! I am so gonna make these for gifts!!!
ReplyDeletethis is so great, I am trying to find projects to do to keep me busy, since I stopped smoking, and this is just great
ReplyDeleteI have made these over and over now and I just have to thank you for such a great tutorial for something so useful! LOVE THEM!
ReplyDeleteLove these!!! Such a great idea and so easy to make. I'll be making some for me and for presents. Hope you don't mind, but I've pinned. I'd love you to share these at our Ongoing link party that's just for Kitchen Accessories
ReplyDeleteHow do you keep the ribbons from coming out when you wash them? Or do you remove them first? marcialewisministries@yahoo.com
ReplyDeleteWhy not tie them together first?
DeleteIf you read step 6 & 7 it tells you how to keep the ribbon from coming out ;)
DeleteI think I'd try this using a wide ribbon as opposed to the fabric. Then I'd just have to sew down the ends prior to sewing it onto the towel!
ReplyDeleteThank you for a GREAT tutorial! I just wipped up a couple of these. I totally cheated and used bias tape and fed my ribbon through that!
ReplyDeleteI can't wait to make these as Christmas gifts and a few for around our house too. With a 4 year old and a 2 year old, our towels spend most of their time on the floor. I love the idea of using ribbon and/or bias tape! Off to the store to buy some inexpensive bar towels and dig into my scrap bin and ribbon collection. Thanks for the simple tutorial.
ReplyDeleteA set of these in different seasonal patterns would make a great housewarming or bridal shower gift too.
What a great idea. It will keep me from washing my towels every time the boy touches them and they hit the floor. It gives me a new look for a gift I am making and will be useful in the future. Thanks for the detail tutorial. I am not a novice but I can make anything from a picture. THANKS!!!
ReplyDeleteThese are cute but I have knobs on my drawers instead of handles, is there something out there that I can make to fasten them to the knobs?
ReplyDeleteelsiesimpson@sbcglobal.net
Hi! I loved your tutorial, i translated to my blog in portuguese, and i want to make one of these for me soon. Kisses.
ReplyDeleteI was thinking about the ribbon getting tattered over time or caught on things, and also about the person with knobs instead of handles, and I have a couple of thoughts: I might fold the towel over the oven handle as you do and then put a large button and corresponding buttonhole on each edge of the towel. To make it cute and ruffly like the gathered ribbon method, you could add a decorative strip of fabric and permanently gather the towel for the same skirt-like effect. For knob-style handles you could add a loop of fabric to a corner or edge of the towel to hang it up, and again you'd have the option of embellishing/gathering it to look cute. I've discovered that it doesn't work to hang a towel on a drawer above a cabinet door or another drawer, as the towel would get caught every time you opened the lower door/drawer.
ReplyDelete