Thursday, May 27, 2010

Tiny quilts for tiny babies

My husband and I know a couple whose twins were recently delivered prematurely at 28 weeks gestation.  These amazing, tiny babies are fighters and they're growing stronger every day!

Since these babies will be staying in the NICU for a while, I decided they might need some colorful quilts to brighten their surroundings.

This one's for the baby boy, Tuller -

Front 
and back-

Tuller's quilt is made mostly with Moda's Make Life fabric.  I added Michael Miller's Groovy Guitars to the back because Tuller's daddy is a musician.


And this quilt is for Ada, the baby girl -

Front
and back

Ada's quilt is made with Tula Pink's Plume fabric, and a tiny piece of Groovy Guitars on the back for fun.

Both quilts measure approximately 28" x 31".  My hope is that they will bring a bit of cheer to this new family of four!

Please lift up a prayer for these tiny babies, that they will grow big and strong, and for their parents, that they will have strength and peace and hope during this trying time.  If you would like to follow their story, they're blogging about their journey here.


Sunday, May 23, 2010

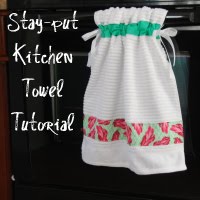
Tutorial: Stay-put Kitchen Towel

Hooray for Anna's "Spice Up Your Kitchen" event over at Noodlehead!  I'm so glad that Anna invited me to participate, because my kitchen definitely needed some spicing up and this was just the motivation I needed!

I have a husband and a two-year-old daughter, and we all love to eat!  So as you can imagine, we spend a good amount of time in the kitchen.  With all that activity, it drives me NUTS when our kitchen towel ends up on the floor.  With a two-year-old this happens a lot!

I'm excited to share my solution with you . . . the Stay-put Kitchen Towel.  It's easy to make and you can showcase your favorite fabric on a previously boring kitchen item.  Perfect!


(Scroll to bottom of post for a printable version of this tutorial.)

Materials:
  • one kitchen towel, and be sure to prewash if it's new!
  • three strips of fabric (see cutting details below)
  • 2 yards coordinating ribbon for ties
  • coordinating thread
  • measuring tape
  • rotary cutter, self-healing mat, and ruler
  • sewing machine (and I recommend using a walking foot if you have one)


Step 1: Cutting

Cut three strips of fabric as shown in picture below:


Step 2: Fold under raw edges of strips

With right side of fabric strip facing down on your ironing board, fold over 1/4" on each short side toward the wrong side of fabric and press.  


Repeat for all three strips of fabric.


Step 3: Determine spacing and place strips on towel

Using your measuring tape, measure around your oven door handle and determine where you'd like your ribbon ties to fall.  (For my handle, I'll sew the ribbon ties 6" apart.)


Place strips on towel, spacing your top two strips based on your measurement from the last step.  I measured from center of strip to center of strip, since the ribbon ties will be inserted behind the center of each strip.


Pin strips in place to prepare for sewing.


Step 4: Sew strips onto the towel

Stitching close to the edge, sew strips onto the towel


IMPORTANT: For the top two strips, sew only the top and bottom (long sides) to the towel, leaving both short sides open.  This creates a tube where we'll insert the ribbon in Step 5.

For the bottom decorative strip, stitch along all four sides.


Step 5: Feed ribbon through the tube

The easiest way to do this is with a Clover Easy Turn Tool (shown below - I got mine in the sewing section of our local craft store.)  If you don't have one, attach a safety pin to the end of your ribbon and "inchworm" it through your top tube.


Step 6: Measure and sew the ribbon tie


Step 7: Create the gather

Hold the loose end of your ribbon taut while you gather your towel to the desired width.  Just go with whatever looks good to you.

Pin loose end of ribbon in place, and cut your ribbon to the same length as the other side.


Stitch along the edge of the fabric tube, securing it to the towel and sandwiching the ribbon in between (just like the other side.)


Step 8: Finish the towel

Repeat steps 5 through 7 for the second strip, and you're done!


Go ahead and tie it onto your oven door handle.  Nice job!


(Added 6/6/10):


Treat your ribbon ends to prevent fraying
Touch each raw edge of cut ribbon to an open flame (a lighter or candle will do.)  You'll notice that the end of your ribbon will melt slightly, "curing" the ribbon and preventing fraying in the wash.  Easy!

Items made from this tutorial are for personal use only, please.


Happy sewing!
Mary
Friday, May 21, 2010

And the winner is . . .

#161, Shana!

The Reversible Nicey Jane Bag will be headed your way soon!

This year's Sew,Mama,Sew Giveaway Day was a blast.  I'm going to kind of miss getting 200 emails a day.  Looking forward to next year!

Happy sewing,
Mary

Thursday, May 20, 2010

I heart potholders!

Try not to be too jealous . . . but look what I got in the mail last weekend!


Amy of During Quiet Time made me these awesome potholders for the Potholder Pass Round 2, and she also sent some adorable mini potholders for Lauren to use!

Lauren loves her new potholders -


but I love mine more :-)


You can read more about these awesome potholders and my sad tale of lost mail here.

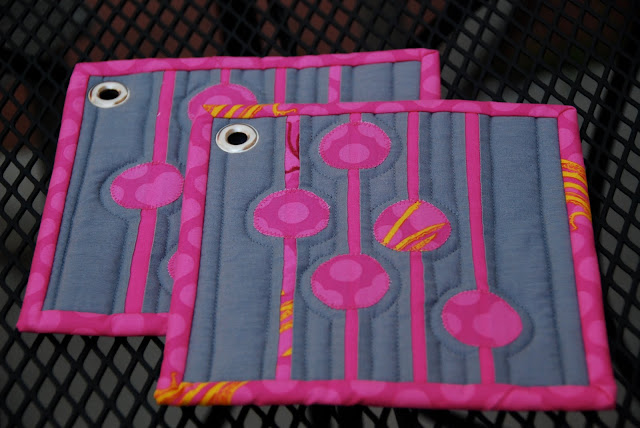
Next, here's what I've been working on the Potholder Pass Round 3:


These were inspired by the amazing Winter Rainbow quilt by Faith at Fresh Lemons.  If you haven't seen this quilt yet, you have to check it out!

I've admired this quilt for a while, and when I discovered that this quilt was also a "fave" of my secret partner on Flickr, I was instantly inspired!  I made the potholder on the right first, pulling out stacks and stacks of fabric and sewing together little strips to make the blocks.  I love how it turned out, but it took a LOT of work, so I made the potholder on the left a bit simpler.  I think they make a great pair!

I wanted to keep up with all the other cool ladies in the Potholder Pass and try my hand at adding grommets.  (Everyone else is doing it!!!)  Unfortunately the actual installation has been a little harder than expected.  I've been hammering away on my grommet tool and can't seem to get the darn thing to bend and play nice!

Here's the back, and as you can see my sad, sad grommets aren't fully installed yet.


I think it's time to swallow my pride and ask the husband for help!

Am I just a huge wimp, or has anyone else out there had trouble with their grommets?

Happy sewing!
Mary

Sunday, May 16, 2010

Giveaway Day: Reversible Nicey Jane Bag


If this is your first time visiting my blog, welcome!
If you're a regular, welcome back :-)
Either way, I'm glad you're here!

Up for grabs today:
this Reversible Nicey Jane bag! 
I think it would be perfect for all of your spring-time adventures.


This bag is kind of special to me, because it was the subject of my very first blog post!
It was made using the Lickety Split bag pattern by Made by Rae.

You don't have to jump through any hoops for this one . . .
just leave a comment and you're entered!
(One entry per person, please.)

Be sure to include your email address so I can reach you if you win.
(If it's linked to your Blogger account and viewable to the public, that's fine too.)

I'll accept entries until 11:59 eastern time on May 20th,
then I'll choose a winner with random.org.

International entries welcome.
Good luck!

Happy sewing!
Mary

Thursday, May 13, 2010

Coming soon to a blog near you!

Just popping in to tell you about some exciting events coming up soon in blogland!

First, prepare yourselves for Spice Up Your Kitchen Week over at Noodlehead!
Anna has teamed up with some of her favorite bloggers,
and starting May 17th, she will share 10 days of fantastic tutorials
you can use to spice up your kitchen!
(Oh, and did I mention that I'm one of the contributing bloggers?
How cool is that?
I've been working feverishly on my kitchen project and I can't wait to share!)

Next . . . have you heard about May Giveaway Day over at Sew,Mama,Sew?
Basically, anyone with a shop or blog can participate by offering a giveaway on May 17th.
All of the participants will be listed on the Sew,Mama,Sew blog that day, 
so prepare yourselves for a LOT of blog-hopping and giveaway-entering!
If you want to participate by offering a giveaway, follow this link for details.
As for me, I'm thinking about offering up this bag, which has been slightly popular on Flickr.  ;-)
I'm looking forward to meeting new people in the process!


And finally, have you heard about the Blogger's Quilt Festival?
This online quilt show looks like lots of fun, and I can't wait to join in!
If you're a quilter, you should too!
(I was hoping my "Man Quilt" would be done in time,
but unfortunately that's not going to happen!
Oh well.)

That's all for now . . . Happy sewing!
Mary

Monday, May 10, 2010

Modern Siggy Swap Round #2

Come on and join in the fun!


Details can be found here.
You have until the end of the week to sign up!

Thursday, May 6, 2010

Guest post at Come and See the Seitz

I am so honored to be doing a guest post over at Come and See the Seitz today!


You can check out my post here.  

It's full of my favorite tutorials, with tons of ideas for last minute gifts for mom.


Happy sewing!

Mary

Wednesday, May 5, 2010

WIP Wednesday

Happy Cinco de Mayo, sewing friends!

Being the wild girl that I am, I celebrated with a little sewing :-)

Here's what I've been working on . . .

potholders for the Potholder Pass 3 -

WIP - Potholder Pass 3


WIP - Potholder Pass 3


I can't even tell you how excited I am about these potholders. My secret partner requested "bright and modern," which is right up my ally! I just need to hand sew the binding to the back and these fun potholders will be done.


Next is a work in progress that's been sitting around since December -


WIP - Disappearing 9 Patch Tablerunner


Sad but true, this table runner has been sitting like this since Christmas! Everything but the binding is done. What's even more pitiful is that I've been using this on my dresser for at least a month . . . with no binding on it! (Can you tell that's my least favorite part?)


Looks like I need to hunker down and have a little binding party tonight. (Yup, that's how I roll!)


Have yourselves a happy Cinco de Mayo!
Mary
Related Posts with Thumbnails